

Table of Contents
- Why Astrophotography Prints Need Special Display Care
- Start with a Perfect Digital File: Color Calibration and Resolution
- Choosing the Best Paper for Astrophotography Prints
- Acrylic vs Metal Prints for Astrophotography: Which Wins?
- Mounting, Framing, and Glass Options for Deep-Sky Images
- Lighting for Wall Art: Eliminating Glare and Enhancing Nebulae
- Long-Term Protection: UV Damage, Humidity, and Archival Quality
- Final Checklist for Displaying Your Astrophotography
- Frequently Asked Questions
Last Updated: September 4, 2026
Why Astrophotography Prints Need Special Display Care
Astrophotography prints are not standard wall art. A deep-sky image contains subtle gradients, faint dust lanes, and delicate star colors that vanish under poor display conditions. Whether a print looks stunning or washed out often has nothing to do with the image itself and everything to do with how you frame, mount, and light it.
Most photographers spend hours calibrating their monitor and perfecting their edit, then hang the final print where glare kills contrast or direct sun fades the ink within a year. Displaying astrophotography prints properly requires attention to the physical environment: lighting, protective materials, and mounting surface all affect what you see.
This guide from FLM covers the full process, from preparing a color-accurate digital file to choosing paper, acrylic, framing, and lighting that will make your nebulae and star clusters look their best for decades.
Start with a Perfect Digital File: Color Calibration and Resolution
The display process begins before you print. A properly calibrated monitor with an ICC profile ensures what you see on screen matches what comes out of the printer.
The common mistake here is editing in sRGB and printing without soft proofing. For astrophotography, Adobe RGB captures a wider color gamut that preserves the reds and blues of emission nebulae. Convert your file to the printer's ICC profile and enable black point compensation during the soft proofing step.
Resolution matters equally. Print resolution should sit between 300 and 360 DPI for close viewing (nasa.gov). An image destined for a 16x20 inch print needs roughly 4800x6000 pixels. Upscaling a low-resolution file introduces noise reduction artifacts and soft stars that become obvious on large prints.
Choosing the Best Paper for Astrophotography Prints
The paper you choose is the single most consequential decision for how faint nebulosity and dark sky backgrounds survive the trip from screen to wall. The right paper controls how light scatters at the surface, determining whether a black background reads as deep space or a flat gray rectangle.
Why Glossy Fails for Deep-Sky
Glossy and luster papers reflect a high percentage of incident light directly back at the viewer, creating veiling glare on the darkest areas. This compresses tonal range, burying faint galaxy arms or dust lanes. Matte and satin surfaces scatter light diffusely, so dark areas stay dark from a wider range of viewing angles.
The Brightness and OBA Problem
Paper brightness is measured on a scale where 100 is a theoretical perfect reflector (loc.gov). Many consumer photo papers are rated at 98 or higher because they contain optical brightening agents (OBAs), fluorescent compounds that absorb UV light and re-emit it as visible blue. That makes the paper look whiter under daylight or cool LED lighting, but it creates a specific problem for astrophotography: the blue glow lifts the appearance of black areas, making space backgrounds look hazy or slightly cyan.
Over time, OBAs degrade. A paper that looks neutral white when new can yellow noticeably within a few years, shifting the color balance of your entire print. For archival display, look for papers explicitly labeled "OBA-free" or "no optical brighteners." Hahnemühle Photo Rag, Canson Infinity Platine Fibre Rag, and Epson Hot Press Bright are commonly cited in printing forums as low-OBA or OBA-free options that maintain neutral blacks. These are not endorsements, they are the names you will encounter most often when researching this topic.
Weight, Texture, and Ink Holdout
Paper weight matters for physical stability. A 190 gsm paper will buckle without rigid backing in fluctuating humidity; 300 gsm or heavier cotton rag papers resist warping and hold more ink, improving density in the darkest shadows.
Texture is a trade-off. Heavily textured paper diffuses light well but softens fine star detail; smooth matte or satin preserves star roundness. For tight double stars or delicate planetary detail, err toward smooth surfaces. For wide-field Milky Way shots with small, numerous stars, subtle texture is acceptable and can reduce the appearance of noise.
The Satin Compromise
Satin or semi-gloss papers sit between matte and glossy. They offer a slightly wider color gamut than matte, useful for the deep reds of hydrogen-alpha emission nebulae, while scattering reflections more effectively than glossy. The trade-off is that satin still shows some glare under direct light, demanding careful positioning relative to windows and picture lights.
A Practical Selection Framework
For a first large-format astro print, a smooth matte cotton rag paper at 300 gsm or heavier is the safest starting point. If matte blacks look too flat or you want more punch in the reds, move to satin and adjust lighting. Avoid glossy entirely for deep-sky work, it suits high-key subjects like the Moon, where contrast is already extreme.
Whichever paper you choose, verify that your printer profile is specific to that exact paper and ink combination. A profile for a different paper weight or finish will shift colors and can crush shadow detail, undoing the benefits of your paper choice before the print is even mounted.
Acrylic vs Metal Prints for Astrophotography: Which Wins?
The acrylic-versus-metal question dominates astrophotography display forums, but there is no simple winner. The right choice depends on your subject, your room's lighting, and whether you prioritize contrast or depth.
What Each Process Actually Does
A true acrylic print is face-mounted: the photographic paper is adhered to the back of a sheet of acrylic (typically 1/4-inch or 6mm thick), and the image is viewed through the acrylic. This optical gap adds depth and makes colors appear more saturated and luminous. The acrylic also protects the print surface from dust and fingerprints.
A metal print infuses dye directly into a coated aluminum sheet using heat. With no paper layer or protective glass, the image sits on the metal's surface, giving a sharp, immediate look with high contrast. Because the dye is embedded in the coating, metal prints resist scratches and moisture.
The Physics of Black and Glare
For deep-sky images, the critical difference is how each surface handles dark areas. Acrylic's optical layer can make blacks look deeper because the glass reduces light scattering off the paper. However, uncoated acrylic is highly reflective, under a ceiling light or bright window, you will see a mirror-like reflection of the room on the darkest parts of your nebula. This is the most common complaint about acrylic prints in home settings.
Metal prints have a matte or semi-gloss finish depending on the coating. They reflect light more diffusely, meaning less specular glare, but the aluminum surface can produce a slight metallic sheen that washes out faint shadow detail. For high-contrast subjects like the Moon or solar prominence, this is a non-issue. For faint supernova remnant shells, it can be the difference between visible structure and a smooth gray fade.
The Anti-Reflective Option Most Guides Miss
Most comparisons stop at "acrylic is glossy, metal is matte," but there is a third path: anti-reflective (AR) coated acrylic. AR coating reduces surface reflection from roughly 8% down to under 1%, eliminating the mirror problem while preserving acrylic's depth and color saturation (nist.gov).
AR-coated acrylic is significantly more expensive and requires careful handling, the coating can be scratched by abrasive cleaners. But for a large-format deep-sky print in a room with uncontrolled lighting, it is the only option delivering both deep blacks and glare-free viewing. Ask your lab specifically for "anti-reflective acrylic" or "AR acrylic face-mount"; many offer it as a premium upgrade but few mention it unless asked.
Weight, Mounting, and Wall Reality
Acrylic is heavy. A 24x36-inch print face-mounted to 1/4-inch acrylic weighs roughly 15 to 20 pounds before framing, requiring a wall anchor rated for that weight on a wall not subject to vibration or impact. Metal prints are lighter, typically 5 to 8 pounds for the same size, and can be hung with simpler hardware.
Acrylic prints are usually mounted with a floating frame or standoff hardware, creating a clean, modern look but exposing edges that can catch light. Metal prints are often mounted flush or with a thin aluminum subframe for a more minimal profile.
A Decision Framework Based on Subject and Room
For faint, color-rich deep-sky objects, the Veil Nebula, the Soul Nebula, the Rho Ophiuchi cloud complex, acrylic with AR coating is the strongest choice if your budget allows. If budget is tight, standard acrylic is still better than metal for these subjects, provided you control lighting with a picture light angled at 30 degrees and avoid placing the print opposite a window.
For high-contrast subjects, the Moon, solar images, bright globular clusters, metal is the practical winner. The subject's inherent contrast does not need the depth boost, and metal's lighter weight and lower cost make it easier to display. Metal also handles humid environments better than paper-based acrylic prints.
The Archival Angle No One Else Covers
Neither acrylic nor metal is inherently archival on its own. Acrylic print longevity depends on the paper and ink used before face-mounting, dye-based ink fades behind acrylic as fast as under glass. Metal prints are more fade-resistant because the dye is embedded in a UV-stable coating, but they are not immune to color shift. For a print that outlasts a decade, ask your lab for pigment-based inks in the acrylic face-mount process and confirm the aluminum coating includes a UV inhibitor.
Before ordering, request a physical sample from your chosen lab. Print the same test image on acrylic (standard and AR-coated if available) and on metal. View them in your actual room at the time of day you most often see the wall. The differences will be immediately obvious, and you will avoid a costly mistake.
Mounting, Framing, and Glass Options for Deep-Sky Images
A rigid backing prevents buckling or waving over time. Gator board or foam backing keeps the surface flat and protects against humidity changes. For large prints, aluminum composite panels offer the most stability.
Framing with glass introduces reflection problems. Standard glass reflects ambient light and obscures dark sky backgrounds. Museum glass with anti-reflective coating eliminates most glare while providing UV protection. The cost is higher, but for a deep-sky image with large dark areas, the difference is dramatic.
When converting a digital image to a physical print, account for aspect ratio changes. A 2:3 digital file does not fit a 16x20 frame without cropping. Decide whether to crop the image or print with a custom mat that preserves the full frame; many astrophotographers prefer the mat approach.
Lighting for Wall Art: Eliminating Glare and Enhancing Nebulae
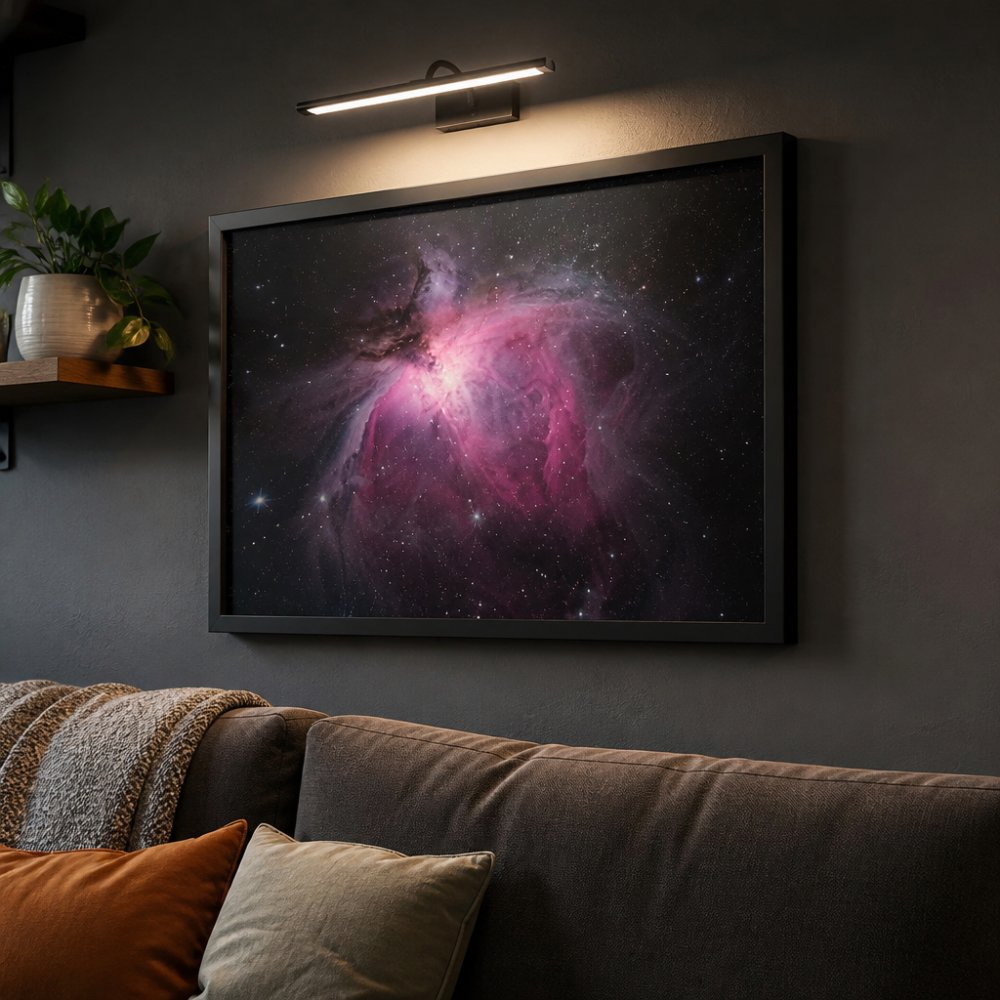
Display lighting determines whether your print looks vibrant or flat. Picture lights mounted above the frame and angled downward at 30 degrees illuminate the surface evenly while minimizing reflections. Track lighting works well when positioned to avoid direct reflection off glass or acrylic.
The color temperature of your display lighting affects how the print appears. Warm incandescent light shifts whites yellow and dulls blue nebulosity. Neutral white LEDs around 4000K reproduce colors most accurately. Avoid cool blue lighting that makes dark sky backgrounds look gray.
Ambient room lighting matters too. A print on a wall opposite a bright window will suffer from glare during the day. Position astrophotography prints on walls perpendicular to windows or use blackout curtains to control the light hitting the glass.
Long-Term Protection: UV Damage, Humidity, and Archival Quality
The biggest threat to astrophotography prints is UV radiation. Direct sunlight fades pigment inks within months, and even indirect light causes gradual color shift over years. UV-protective glass or acrylic blocks most damaging rays while keeping the image visible.
Humidity causes paper to expand and contract, leading to warping and mold growth in extreme cases. Keep prints in rooms with stable humidity between 35% and 50%. Bathrooms and kitchens with fluctuating moisture levels are poor locations for valuable prints.
Archival quality depends on the entire chain: pigment inks, acid-free paper, UV-protective glazing, and proper mounting. Each component protects against a different failure mode. Skimping on any single element compromises the whole display. These details determine whether the image lasts five years or fifty.
Final Checklist for Displaying Your Astrophotography
Before you hang your print, run through this checklist to verify every element is handled:
- Calibrate your monitor and soft proof using ICC profiles
- Export at 300-360 DPI with Adobe RGB color space
- Choose matte or satin fine art paper for faint nebulae
- Select acrylic for color-rich deep-sky images
- Mount on gator board or aluminum for rigid support
- Use museum glass with anti-reflective and UV protection
- Position lighting at 30 degrees to eliminate glare
- Keep humidity between 35% and 50%
- Avoid direct sunlight on the print surface
- Verify aspect ratio conversion before printing
Displaying astrophotography prints well is a series of small decisions that compound. A color-calibrated file on archival paper behind museum glass with proper lighting will look as good in ten years as it does today. Skip one element and the print degrades faster than you expect.
Frequently Asked Questions
What is the best paper finish for astrophotography prints?
A matte or luster finish is the best paper for astrophotography prints. Glossy paper can produce strong reflections that hide faint nebulosity and star colors. Matte paper scatters light, but it can soften the sharp star points. Luster paper, which sits between the two, offers a good balance: it keeps the contrast high and detail sharp while reducing glare more effectively than high-gloss options.
Should I use acrylic or glass for mounting space photography?
Use non-glare acrylic instead of standard glass for deep-sky images. Acrylic is lighter and significantly reduces the glare that washes out faint galaxies and nebulae. If you choose glass, pick an anti-reflective, UV-protective type. Acrylic also offers better impact resistance, making it safer for larger prints. Ensure the acrylic has a UV coating to prevent the dark background from fading over time.
How does lighting affect the visibility of deep-sky astrophotography?
Lighting determines whether you can see faint details. Direct overhead lights or spotlights reflecting off the glass will obscure dim nebulosity. Use a dedicated picture light aimed at the print from a 30-degree angle, or track lighting that hits the wall without shining into the viewer's eyes. Dimmable warm-white LEDs offer the most control for adjusting the lighting for wall art based on the time of day.
How do you prevent glare when displaying dark astrophotography prints?
Prevent glare by using a matte or luster paper finish and non-glare acrylic glazing. Position the print away from direct sunlight and bright lamps. The most effective method is to install a picture light above the frame that illuminates the image without reflecting off the surface. If you are comparing acrylic vs metal prints, acrylic with a matte finish typically handles ambient reflections better than a high-gloss metal print.
Getting your astrophotography prints to look their best takes patience and attention to detail, but the reward is a display piece you will enjoy for years. At FLM, we understand the passion behind space-themed display pieces, from precision 3D printed starship models to custom collectibles designed for shelves and desks. Explore our curated shop for display-ready pieces crafted with the same care you bring to your photography, and get started with FLM to find your next conversation piece.
This article was written using GrandRanker
0 comments